Contour Lines or Shaded Relief: Two Ways to Read a Mountain Map
Contour lines or shaded relief each reveal different terrain clues. Learn how to read both layers to recognize mountain shape and interpret a map with confidence.
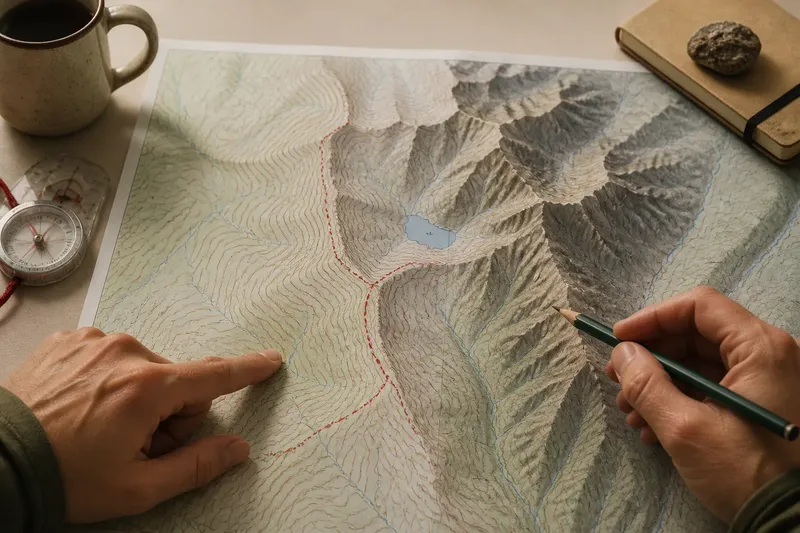
At a trail junction, contour lines or shaded relief can give you very different first impressions of the mountain ahead. Contours show how elevation changes across the map; shaded relief makes the surface’s folds and hollows easier to picture. Knowing what each layer actually represents helps you read the landscape without mistaking visual drama for a measurement.
Contour lines encode elevation
A contour line joins points at the same elevation. Lines wrapped around a summit, basin, or spur map the land’s shape, while the contour interval in the legend tells you the elevation difference between neighboring lines. Read the labels and interval before interpreting an unfamiliar map; crowded marks alone do not tell you the exact rise.
Line spacing offers a relative sense of slope. Closely packed contours indicate elevation changes over a short horizontal distance; wider spacing indicates a more gradual change. That describes the mapped ground, not the full experience of walking there. Loose rock, vegetation, exposure, and the map’s scale can all affect how a route feels.
Contour bends can help distinguish drainage from a ridge. Where lines cross a stream valley, their V-shaped bends generally point uphill toward the valley’s source. Along a spur, the bends tend to point downhill. Closed loops may mark a summit or a depression, so check elevation labels, spot heights, and any hachures before deciding which.
Shaded relief emphasizes landform
Shaded relief uses simulated light and shadow to suggest the shape of the ground. A broad ridge, gully, cliff band, or bowl may stand out more quickly than it does among tightly packed lines. The effect is visual, not photographic: a dark patch does not, by itself, identify a cliff, a hollow, or a hazard.
The apparent shape depends on the light direction chosen for the map. Change that direction and slopes can seem more or less prominent. A rounded shoulder may look dramatic without being especially high, while a broad plateau may appear subdued. Use contours, elevation labels, or spot heights when you need to know altitude rather than appearance.
Shading works best when it does not compete with the information layered over it. On a printed topographic map, contours, trails, and names may sit above the relief; digital maps may offer it as a selectable layer. If a trail or stream becomes hard to distinguish, switch to a clearer style or reduce the visual emphasis of the background.
What does each map style make easier to see?
How can I compare two slopes?
Compare contour spacing across the same area: tighter spacing indicates a steeper mapped slope than wider spacing nearby. Shaded relief can help you picture the slope’s shape, but contours are the more direct clue to elevation change.
Which layer helps me recognize a basin?
Shaded relief can make a broad bowl or enclosing rim easier to notice at a glance. Contour shapes help confirm the form and show how its elevation changes toward the center.
Can shading tell me a summit’s elevation?
No: shading depicts apparent form, not a direct elevation reading. Look for a labeled contour, spot height, or other elevation information in the map’s legend.
Why does a ridge look like a hollow?
Simulated light can make a feature seem inverted if its direction conflicts with what your eyes expect. Check the map’s lighting convention if available, then compare the feature with contour bends and nearby drainage.
Use both layers to interpret a feature
Start with the question in front of you. Contours are useful for tracing changes in elevation and the shape of a route’s climb; shaded relief helps you see how ridges, gullies, and bowls fit together. Compare the same feature in both layers, then consult labels and the legend rather than letting one visual impression settle the matter.
Imagine an invented map of a trail curving around a high basin. Its shaded relief makes the enclosing rim and a side gully easy to distinguish. The contour lines show that the trail follows the basin’s slope instead of crossing the rim. Together, those clues describe the route’s mapped shape; they do not establish whether the trail is open, passable, or suitable for a particular hiker.
Think of the two layers like a street address and a sketch of a building: one gives structured information, while the other makes the overall form easier to picture. Read contours, then relief, then labels and route marks. A trail line is not proof of current conditions, and terrain shading does not show every obstacle on the ground.
Check the map before relying on its appearance
Check the contour interval in the legend. If it is clearly stated, use it to interpret elevation differences; if it is missing or unreadable, avoid estimating exact rises from line spacing and choose a map with legible elevation information.
Check whether the elevation labels support your reading of a closed loop. If labels or spot heights indicate higher ground toward the center, read it as a rise; if they indicate lower ground or the map uses hachures, interpret it as a depression; if the clues conflict, leave the feature uncertain.
Check whether shaded relief obscures a trail, stream, or place-name. If those details remain legible, keep the layer visible; if they blend into the background, switch styles or use a less prominent relief layer.
Check the map scale and level of detail. If the map shows the feature you need to interpret, use it for that task; if small gullies or short ridges matter but are not depicted, consult a more detailed map rather than inferring their shape.
Check that the trail line and terrain feature agree across the layers. If contours and labels clarify the route’s mapped position, use them to understand its shape; if the layers are ambiguous or inconsistent, do not resolve the uncertainty from shading alone.
Check the map’s date, source, and any available trail-status information before treating a route marking as current. If current status is available, consult it; if it is not, regard the map as a terrain reference rather than confirmation that the route is open.
For mountain map reading, let contour lines answer questions about elevation patterns and let shaded relief help you picture landform. The legend, scale, and other map details determine how much confidence each layer deserves—and a map’s image remains a representation of terrain, not the terrain itself.